Here you are method statements related to natural hydraulic lime-based plasters
Kimia has formulated specific products for the consolidation, realization and skimming of traditional plasters. All Limepor and Tectoria products are particularly appreciated for their qualities of durability and versatility in adapting to the most varied aesthetic needs as well as compatibility with the existing materials on site, guaranteed by the use of CE marked natural hydraulic limes.
Please find method statements for the following applications:
► Re-adhesion of detached even frescoed plasters to substrates
► Application of traditional renders
► Horizontal chemical barrier to block capillary rising damp
► Dehumidifying macroporous plasters
► Skimming coats
Re-adhesion of detached even frescoed plasters to substrates
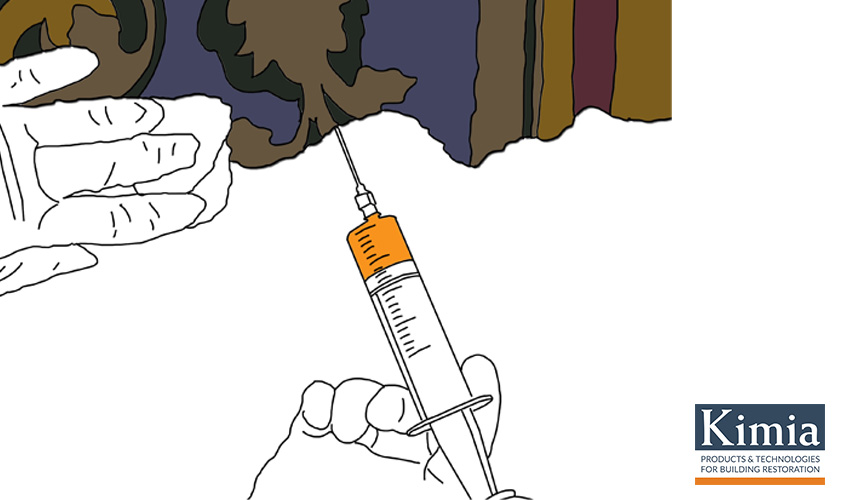
Injecting of Limepor IZ4, lime slurry to restore the adhesion between masonry substrates and render, including frescoed walls.
The hydraulic binder must be suitable for use on site to make salt-resistant, volumetrically-stable, super-fluid injection slurry which is also easy to inject manually using a large-capacity syringe, such as those used in veterinary applications, or by gravity casting.
On structures with frescoed render and/or of historical or artistic interest, while grouting and “sealing” the cracks and gaps in the substrate, fasten small pieces of soft, rubber tube in place at a suitable pitch.
In this case, we recommend that the inside of the structure is not “wetted”, in that it could cause irreparable damage to the frescoes.
Inject the product starting from the bottom working upwards to help expel air in the structure and fill all the cavities.
When the slurry seeps out of a tube or injector near the one being injected, stop injecting, close the injector used and continue the operation from the tube or injector from which the slurry seeped out. Follow this pattern until the slurry seeps out of the highest hole.
When the consolidation procedure has been completed, remove all tubes and injectors and grout the holes with a suitable mortar from the Limepor or Tectoria range.

Application of traditional renders
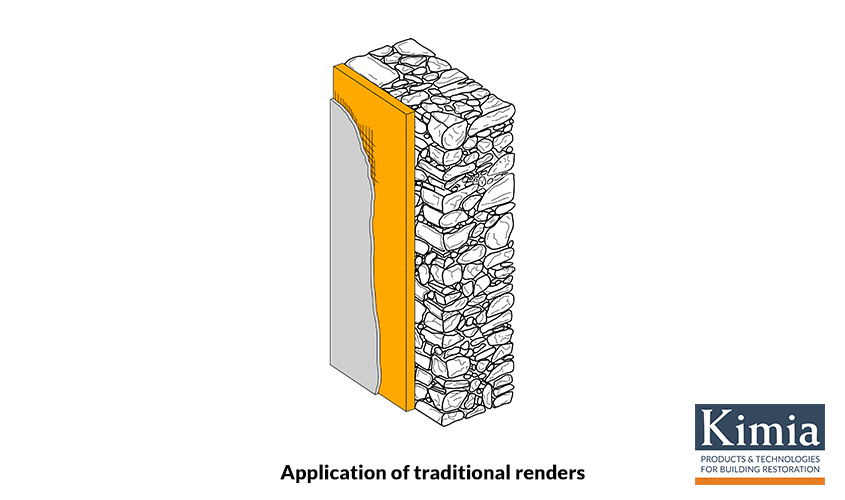
Apply Tectoria PMP or Limepor MT render after adequate preparation of the substrate, on a clean, sound, compact substrate with no crumbling portions and no traces of dust, dirt, mildew or soluble salts.
Hydro-clean the surface to remove all traces of material and substances which could compromise the adhesion of any products or systems applied later.
Apply an initial 5 mm thick scratch-coat, to even out the absorbency of the substrate and improve adhesion of the render. Wait until the scratch-coat layer starts to set, then apply a single layer up to 30 mm thick of render by trowel or with a continuous-feed rendering machine, starting from the bottom working upwards.
If the thickness required is higher than 30 mm, apply the render in several layers. Apply each layer without tamping the previous layer.
After applying the render, wait a few minutes and level off the surface using an aluminium H-type or blade-type straight edge by passing over the surface horizontally and vertically until it is flat.
Remove the vertical guides, if they have been used, and fill the gaps with the same product.
Finish off the surface of the render with a damp sponge float.

Horizontal chemical barrier to block capillary rising damp
For structures with uneven core-wall masonry or with voids, all internal cavities must be filled by injecting adequate slurry (Limepor 100, Limepor IZ8). Drill a series of holes at a downward angle of around 20° to a depth of 2/3 the thickness of the wall. The holes should be around 15-30 mm diameter. Drill the holes around 15-20 cm above floor or ground level at a pitch of 10-25 cm. For walls with a thickness of less than 50-60 cm, or which are accessible from one side only, drill two staggered rows of holes and form the chemical barrier on one side only, while for walls thicker than 60 cm, we recommend making a barrier on both sides using the same procedure as described previously.
Clean out the holes with compressed air to remove all traces of dust and residues of material.
Fasten the propagators or injectors in place, according to the injection method chosen, using suitable masonry mortar, which must then be removed together with the propagators or injectors after injecting the chemical barrier.
Inject Kimicover IN in each hole until the structure is completely saturated.
Dehumidifying macroporous plasters
Preparation of substrates
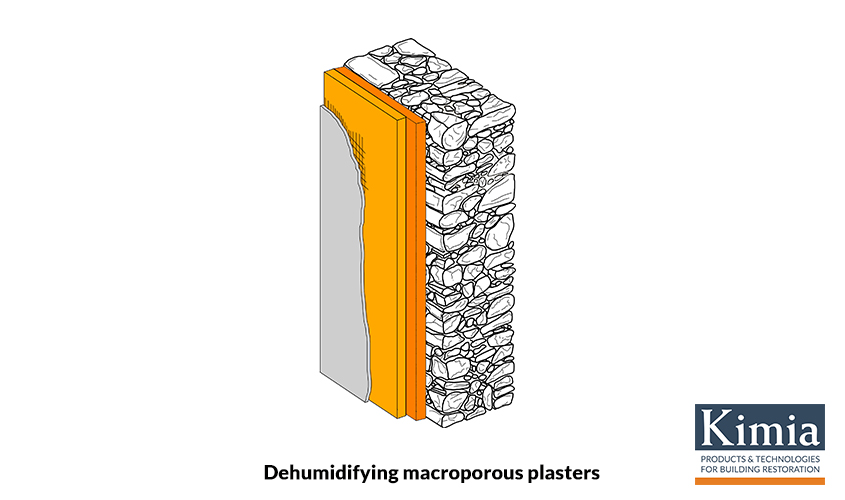
Remove the deteriorated render either manually or with mechanical means to a height of approximately 50 centimetres above the deteriorated area, and in all cases to a height of at least twice the thickness of the wall.
Remove all traces of loose or crumbly material and all traces of dust, mildew and any other element which could compromise adhesion of the dehumidifying cycle until the substrate is clean, sound and compact.
Then clean the wall with low-pressure water jets to remove any efflorescence or soluble salts present on the surface.
Saturate the substrate with water to prevent it drawing off water from the mortar and compromising its final performances. Excess water must evaporate off, so that the masonry is saturated and the surface is dry (s.s.d. condition). Compressed air may be used to speed up this process.
Application of the first scratch-coat layer
Apply a first scratch-coat layer of Limepor RZ (in case of multi-products cycles) or Limepor MONO (in case of single-product cycles) approximately 5 mm thick to completely cover the substrate to be rendered, to improve its adhesion, even out absorption of the substrate and slow down transfer of salts.
On mixed masonry or masonry out of plumb by more than 4-5 cm, which would lead to the layer of render having an irregular thickness, we recommend inserting Ø2 mm zinc-plated metallic mesh with a mesh size of 5x5 cm before applying the scratch-coat layer.
The mesh must be fixed in place to the wall with nails and/or plugs with a small gap between the wall so that it becomes embedded in the middle of the layer of render. Form levelling strips with the dehumidifying render or place vertical guides in position to define the correct planarity and thickness of the render.
Application of the macro-porous dehumidifying render
Wait one day, apply a coat of Limepor RZ (multi-product cycles) or Limepor MONO (single-component cycles) as an adhesion promoter on which, on wet, apply at least 20 mm thick lime dehumidifying render using Tectoria DF (multi-product cycles) or Limepor MONO (single-component cycles).
If the thickness required is higher than 30 mm, the dehumidifying render must be applied in several layers. Each layer must be applied without tamping the previous layer.
After applying the render, wait a few minutes and level the surface using an aluminium H-type or blade-type straight edge by passing over the surface horizontally and vertically until it is flat.
Remove the vertical guides, if they have been used, and fill the gaps with render.
Finish off the surface of the render with a plastic, wooden or sponge float a few hours after application, according to the surrounding temperature and conditions.
Never press down on the surface of the render or porosity could be reduced and, therefore, impede evaporation of the moisture in the masonry.
Notes
Apply the render when the wall is not exposed to direct sunlight and/or wind. In such cases, such as during hot and/or particularly windy weather, take special care when curing the render, especially during the first 36-48 hours.
Spray water on the surface or employ other systems to prevent the mixing water evaporating off too quickly.
If a smoother finish than a normal tamped surface is required, apply a transpirant skimming mortar.
For constructions particularly exposed to rain, if the render does not require any dressing coat, it may be protected with a transparent, transpirant water-repellent product, such as Kimistone IDROREP, Kimistone IBASIL or Kimistone ANTISMOG.

Skimming coats
Apply the finishing mortar Limepor FN or Limepor EDO after adequate preparation of the substrate by removing all loose or detached areas, to obtain a clean, sound substrate with no traces of dust or crumbling portions.
We also recommend that the surface of new render is planed with a metal-tipped cutter to remove any surface laitance and make it easier for the skimming compound to adhere and prevent the formation of air bubbles.
Wet the substrate and apply the product in 1 mm thick layers on a damp substrate using a flat, metal trowel, pressing down slightly to promote adhesion and remove air bubbles entrapped in the porosity of the render.
Apply further layers of the product as soon as the previous finishing coat starts to set, until the required finish is obtained.
If a very smooth finishing is desired, the last coat should be given with Limepor SK.
Once hardened, smooth over Limepor SK with a slightly dampened, flat, metal trowel to obtain a mirror finish.
Info & Technical Support
Other method statements here. If you want to get further info or technical support please fill in the form to get in touch with our Technical Department.

Ing. Diego Aisa, Chief of Export Department
Hello! I am Diego Aisa, I am a structural engineer. I began working for Kimia in 2007. I manage international key contacts and I am Chief of Export Department. I like travelling and I got a thing for photography! Find here my contacts. My Linkedin profile.